We had a bit of a rainy day last Saturday so I never got out into the garden. I didn’t mind though, because I spent the day at the local Book Arts Center to learn how to make a book. Being a visual person, I thought it would be better to document the steps taken by camera rather than by notes.

The Kalamazoo Book Arts Center. I actually flipped the photo around because the typeface always shows backwards and makes it harder to read.

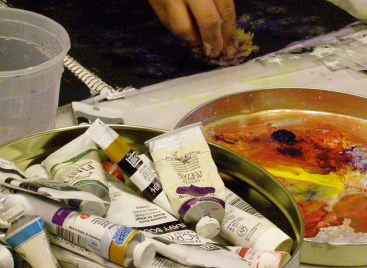
A view of the studio


Tearing and folding the paper. We got 2 large sheets of paper, tore it into 4 pieces, then folded them all in half. The size of the paper determines the size of the finished book.


The folded sheets are grouped into booklets of 4 sheets each, called signatures.


A template is created, marking the outer edges, then 1/2 inch in from either end. You then divide the template into thirds from the 1/2 inch mark and measure 5/16 inch at each third. Then you line up the template and poke holes using an awl (ice picks work well) right in the fold of each signature. Be sure the holes go all the way through.
Then, working from the bottom to the top and back down sew each signature together and to each other. You start at the outside and make a knot with a tail. The long stitching should only show on the inside. As you add each signature, you make a loop, catching the previous signature with the current one being stitched. That way they are all attached together. When all the stitching is done, be sure the last signature is tied to the tail from the beginning. Trim the thread (linen thread or carpet thread)


The sewn pages. It’s beginning to look like a book. Another student sewing up her signatures. You can see that she’s holding everything in place so it doesn’t shift.


Clamping the book in a vise. Using PVA glue (for book binding purposes) we attached a stiffened cheesecloth type fabric called a super and a kind of edging with an embroidered top called a headband (it goes at the top and bottom of the book). These are glued on to the spine and left to dry for about an hour.


Fabric used for the covers of the book has a kind of paper or stiffener on the backside, so when glue is applied, it doesn’t bleed through to the outside cover. The instructor said we could use regular fabric but the back needs to be stiffened, either using iron-on interfacing, or a layer of spray-on glue or we could just use paper instead of fabric.
We used book binder board for our covers, which is harder and firmer than most cardboard, though instructor Jeff said that he had used mat board in the past – 2 pieces glued together that worked as a book cover just as well.
Anyway, figure out how wide the spine will be by measuring the finished book packet and cut the correct size. The front and back covers should overhang the paper packets 1/8 inch on one side and 1/8 inch on the top and 1/8 inch on the bottom. Cut to size.
Lay down the boards on to the fabric and mark the back. First, draw a straight line along the bottom, then trace one book cover all the way around. Extend the top line all the way across the fabric. Then, measure 1/4 inch between the cover and the spine. Trace around the spine, add another 1/4 inch then trace the other cover. Then add 1/2 inch all around the outside edge and a 3/16inch diagonal at each corner. Cut around the outer guide line.

Glue the cardboard on to the fabric using a thin coat of the PVA glue. Don’t get glue on the outside of the fabric. Then glue the 1/2 inch overlap and turn over to the inside of the covers: the long edges first, then the short edges. You create little hospital corners as you glue the corners.
Earlier, a contrasting paper was chosen and cut the same size as the original pages. We cut 2 sheets, one for the front and one for the back. These are called endpapers. The papers are folded in half, then spread glue on half of the sheet and 1/2 inch over the fold. The endpaper is carefully placed on the board with the 1/2 inch overlap glued on the top page of the book packet. It is carefully smoothed in using a bone folder; to smooth any air bubbles and pushing the fold into spine. Tuck a piece of wax paper between the folded endpaper, close the book and flip it over to do the same on the other side. Place the book in a book press or under other large heavy books for 24 hours until the glue is completely dry.

Ta-Da! I’ve got a new gardening journal, or art journal or whatever I want, plus, now I have the skills to make more, maybe as a gift for someone special.
If you want to see the pictures clearer, double click on them.